As the only part of a mountain bike that directly touches the ground, tires are very worth investing in it. So after having good enough tires, how to set the tire pressure suitable for the driver and terrain becomes particularly important.
Table of Contents
What The Impacts Will Cause By Appropriate, Low, And High Tire Pressure?
- Appropriate Tire Pressure: It will balance the grip, rolling resistance, and reliability of the bicycle.
- High Tire Pressure: It will reduce the contact area between the tire and the ground, and the grip will be reduced. The vibration will be more directly transmitted to the hands and affect the ridding experience. However, a proper increase in tire pressure will help to support the sidewall of the tire and protect the rim.
- Low Tire Pressure: It will increase the risk of tire damage when hitting or facing sharp obstacles (such as gravel and tree roots). At the same time, too low tire pressure will affect the elasticity of the tires, resulting in unstable feedback at high speeds. In addition, when riding in a curve, too low tire pressure will reduce tire support, and may cause bead unseating.
What Factors Should We Consider When Setting Tire Pressure?
- Maximum Pressure: The lower pressure of rims and tires the limit value.
- Weight On Tire: This basically only needs to consider the weight of the rider. The greater rider’s weight, the higher the tire pressure required.
- Terrain: This requires the rider to adjust the tire pressure before each ride. For slippery wet roads, you need to properly reduce tire pressure to increase grip; for bumpy roads, you need to reduce tire pressure to achieve a certain degree of suspension; for gravel roads, you need to properly increase the tire pressure to reduce the chance of tire damage.
- Tire Technology: If the tire has excellent puncture resistance, the terrain can be more considered.
- Applicable Level: The lower the applicable level and thinner tire’s sidewall will require higher tire pressure.
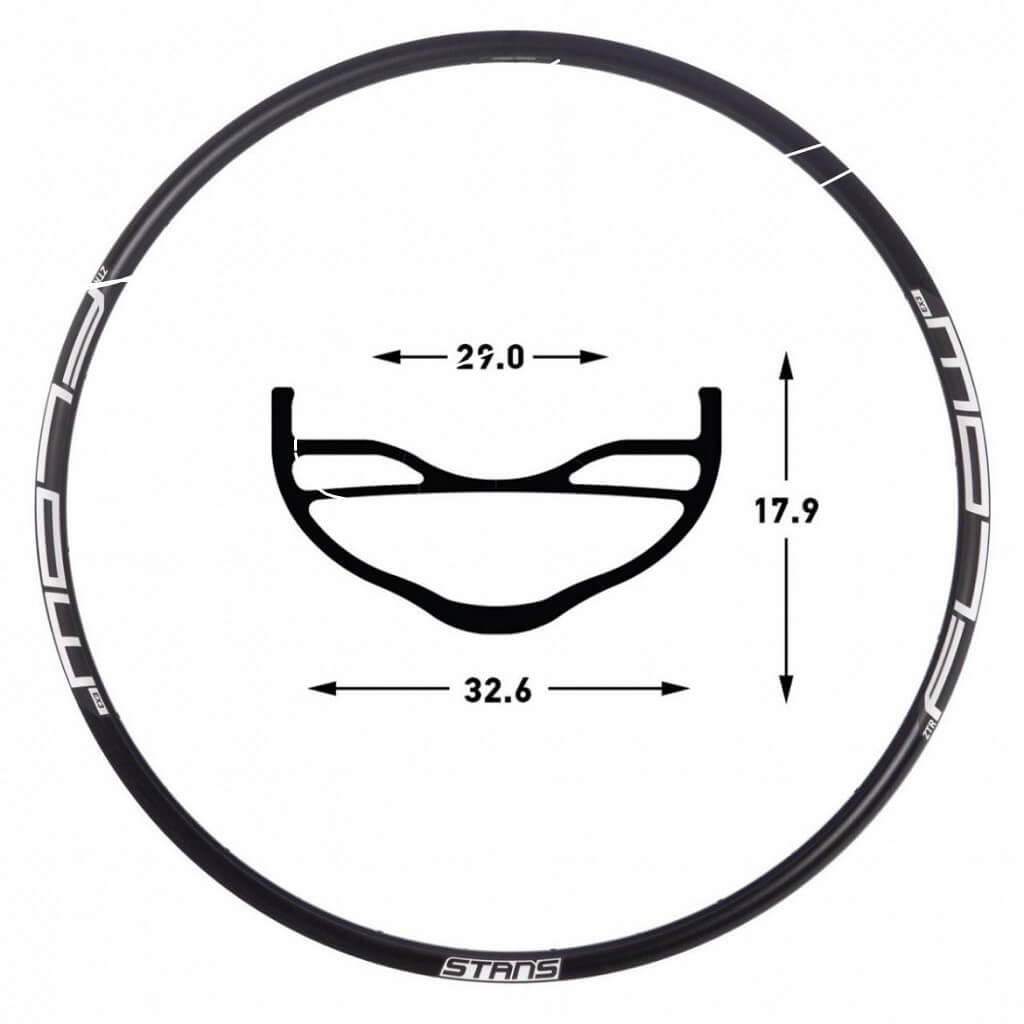
- Tire Volume: A tire with a larger volume can have a lower tire pressure.
- Tubeless Tire: The chance of tubeless tire puncture is greatly reduced, so it is suitable to use lower tire pressure.
- Riding Style: Riders with aggressive riding styles need to properly increase certain tire pressure because they need higher reliability tires.
How To Set A Suitable Tire Pressure?
Step 1 – Set A Suitable Basic Value
The basic value is mainly determined by the rider’s weight, tire volume, tubeless or not, tire technology, and applicable level. Usually, this value is set between 20 and 30 psi.
Take me as an example, weighing 65kg and using 29×2.5 DH thick tubeless tires, I will set the front tire pressure to 21psi and the rear tire pressure to 25psi.
Step 2 – Set The Pressure According To The Terrain
Adjust the tire pressure through actual riding. Choose a cycling road, it does not need to be too long, but it is best to have various terrain (such as curved walls, tree roots, and rocks). The purpose of this ride is to feel the riding experience brought by the previous tire pressure settings.
After finding the right cycling road, increase the tire pressure by about 8 psi from the original basic value. And then, go for a ride. Pay attention to the riding experience and the feedback from the tires. Mainly include: whether the vehicle is bumpy, whether there is insufficient support, and the grip ability.
Next, lower the front and rear tire pressure by 3 psi, and ride again, and feel the difference from the previous tire pressure. Then continue to repeat this process until the tire pressure is suitable.
Step 3 – Adjust The Balance
The center of gravity of the rider is generally on the rear tires, so the tire pressure of the front tires can be fine-tuned at a suitable value to achieve the best balance of grip and stability.